Showing posts with label Crafts. Show all posts

Wednesday, November 30, 2011

Winter time Decorations

These are a few cost friendly, homemade, winter time decorations that everyone will have a blast making!

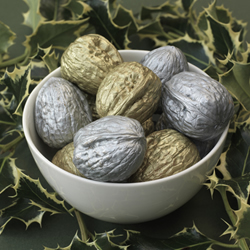
Spray-painted Pinecones 

What you will need:
1. About 12 varying size pinecones. (I'm pretty sure everyone has pinecones laying around their yard, but if not just ask a friend or neighbor if you could help clean up their yard by removing any unwanted pinecones. :)
2. One large cardboard box. (Recycled box.)
3. A few cans of spray-paint. (Whatever colors look best with your house)
What to do:
1. Place 3 or 4 pinecones in cardboard box.
2. Spray pinecones with first color. Let dry. Turn pinecones over and spray. Let dry. 
3. Repeat steps 1 & 2 for each color.


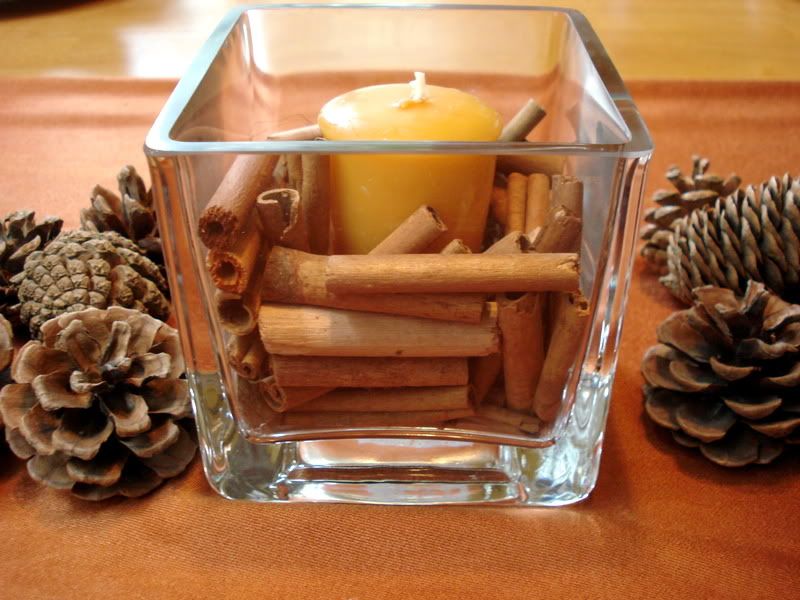
Floating Cranberry Centerpiece 

What you need:
1. Vase/ candle holder
2. Candle (White looks best)
3. Cranberries (fresh works best. NOT FROZEN!)
4. Holly-berry leaves/ with berries. (Or any pretty winter leaf.)
5. Water (Amount varies)
What to do:
I think you can figure that out! : ) 
One tip is to wash your cranberries first.

I thought this was quite cute! Very easy! I think all that was used was:
1. Vase
2. Candle
3. Sugar/salt/sand....?
3. Cranberries.

Very pretty and super simple!
 
 
Cinnamon Stick Candle-holders

This is by far my favorite! And while I've never done this I think it's fairly simple.....?
What you need:
1. Candle/with holder
2. Cinnamon Sticks
3. Small ribbon/ twine
4. Hot glue-gun/ with glue sticks
What to do:
1. Glue each individual stick onto candle holder in and upright fashion
2. Repeat step 1 until candle holder has no bare-spots
3. Let dry
4. Tie ribbon on and enjoy!


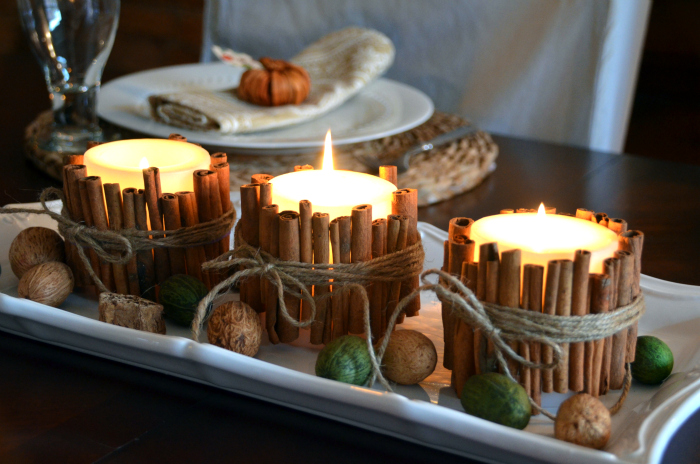
This is by far the easiest craft! No need to explain!


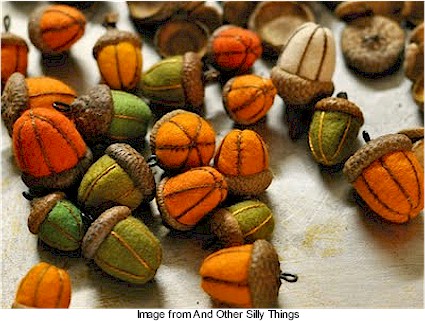
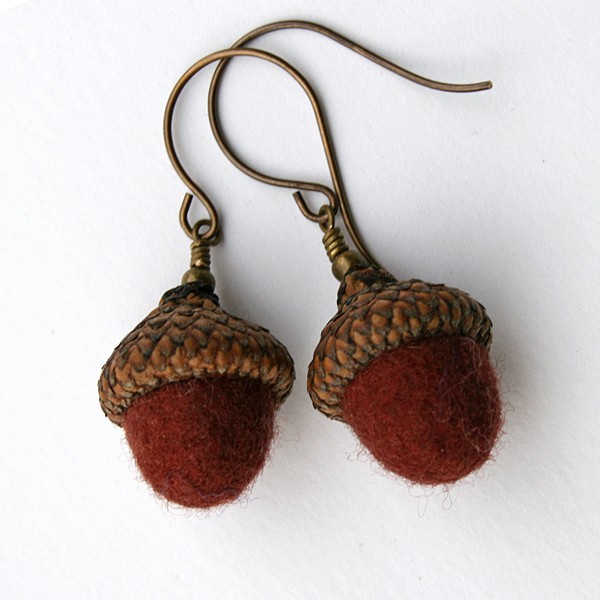
Vase with acorns. very easy, but pretty! 

 Elegant!

 Same idea as the pinecones! : ) pretty cute!


This is the hardest of the craft projects, but very beautiful! 


If you have craft ideas to share, just leave a comment with a link in it on how to or your own instructions!
If you have any questions feel free to ask in the comment box.

Thursday, October 20, 2011

Decorating with pinecones

 Pinecones

I'm always looking for budget friendly craft ideas, and who doesn't have pinecones laying around.
                                                                                                                                                                         
(Top left) Pinecone tree. This is a bit elaborate, but is very pretty.  (Middle right) Turkeycones. This is the one of the funnest crafts to get the kids involved in! Click here for instructions


 (Bottom right) Pinecones wreath, this is a craft that the only limitation is your imagination, and for that reason I would say this is the easiest way to use pinecones How to.
Felt Acorns
Fall is here and we are doing our best to welcome it with an easy craft project.  These felt acorns are perfect for filling a glass jar, working into your table scape, or adorning gifts.  You can probably think of many other uses. 
DSC03284
Felt Acorns
Before you start:
Look for wool felt balls versus felt beads.  The beads for sale are often much harder (intentionally) than balls.  The balls are somewhat malleable and allow for the different shapes you will need to fit various "hat" sizes.
Do not keep your sack of felt balls in plain view if you have a cat.  They love them and you will find yourself searching for them under the sofa.
The felt balls come in many colors.  I chose earthy fall colors for this project, but I could definitely see some of these made with vibrant colors for the holidays.
Get far more acorn hats than you need.  Upon further inspection, some will have flaws that you won't like.  The worst thing that could happen is you have extra for another time.
I especially like it when two hats are attached.  I put all of those aside to use for wrapping gifts.  The ribbon tied right through the joint where they are attached.
Be sure to apply glue liberally.  You don't want it to spill over, but understand that some of it will be absorbed into the felt.  You will get the hang of it very quickly.
(Added Note) you can use felt Here's how! (Not as cute or easy, but you may prefer this method) 
Feltacorn1
Feltacorn2
You will need:
  • acorn hats
  • glue – I used fabri-tac, but I’m sure other glues would do.
  • clear filament – thin, very low test fishing line is sufficient.
  • tape – masking tape is fine.
  • needle threader
  • felt balls - I bought 2cm balls, but you can purchase a variety of sizes to fit a variety of hat sizes.
  • drill
  • 1/16 inch drill bit
 The steps:
  1. Using a dry, old toothbrush clean away any excess dirt from your collected acorn hats.  Discard any that appear unusable.
  2. To make acorns with hangers continue to step 3.  Otherwise skip to step 10.
  3. Turn the acorn hat upside down and brace it on the edge of a block of wood between your fingers.
  4. Carefully drill a hole in the center with a 1/16 inch drill bit.  Try to get as close to the stem as possible without drilling through it.  Preserving it will add some extra character to your finished product.
  5. Measure and cut lengths of filament 6-7 inches long.
  6. Double each filament piece and tie a knot as close to the end as possible.  Make it tight.
  7. Insert the needle threader from the outside of the acorn hat going in.
  8. Feed the loop end of the tied filament into the needle threader and pull through to the outside of the acorn hat.
  9. Secure the knot inside the acorn hat with a tiny piece of tape.
  10. Hold a felt ball up to an acorn hat.  Decide if you will need to make it smaller.  If so roll the felt ball between your palms to shape more like a grape.
  11. When you have the shape that fits properly liberally apply glue inside the acorn hat.
  12. Insert the felt ball and hold for a few seconds.
  13. Set on flat surface acorn hat end down to dry.
  14. Allow to dry completely before use.
DSC03262
Feltacorn3


DSC03286

 Here are more pics:
Multi-color
Very detailed
For sale: cheat
Adorable
Unique Earrings!

craft from: Today's Nest
I hope you love this as much as I do!
 

Saturday, May 21, 2011

Thrifty Headbands

We all want to have cute or nice things - to ware, to carry, or just to decorate with. We all have old things - things we can't use, things that don't fit, or maybe there just not "in" right now. So what do you do about this problem? Get creative! So here are a few ideas for making old into new.

Braided Headband

Materials:
  • 3 scrap strips of fabric
  • Elastic
Instructions:
  1. Cut your fabric into 3 strips measure 20 inches by 2 inches. To get a slightly rougher look, rip your fabric rather than cutting.
     
  2. Place the ends over each other and sew to secure.

     Braided Headband
     
  3. Braid your fabric until you reach the end, and then sew over all 3 pieces again to secure. Make sure you braid consistently. If you start braiding tightly, make sure you braid the entire length tightly.

     Braided Headband
     
  4. Measure your braid and measure your head. Now subtract your braid measurement from your head measurement – this will give you how long your elastic should be. Cut your elastic. You can really use any elastic, but I used fold over elastic because it comes in lots of cute colors.
     
  5. Attach your elastic to the ends of the braid by using a zig zag stitch.

     Braided Headband
     
  6. I also made another thinner head band using ½-inch-wide strips. For this one instead of laying the elastic flat over the braid before sewing, I folded it over the ends encasing them, and hand stitched it closed.

    Braided Headband

    And there you have it! An adorable braided headband you can wear a million ways!
Idea and pictures provided by ~ Fave Crafts ~

Flower Headband


Spring Flower Headband
Materials:
  • CS11236 - Mod Podge ® Paper - Matte, 8 oz.
  • 1" Foam brush
  • Scrap paper
  • Decorative paper
  • Pencil
  • Scissors
  • Wax paper
  • Rick-rack trim
  • Hot glue
  • 3 small silk flowers
  • 3 medium rhinestones
  • Scrap of coordinating ribbon
Instructions:
  1. Create a template of the headband by tracing it on a piece of scrap paper. Using the template as a guide, cut the headband shape from the decorative paper.
     
  2. Using a piece of wax paper and a foam brush, coat the back and front side of the paper with Mod Podge. Position the paper on the headband, press out any air bubbles with your fingers and smooth your brush strokes. Allow to dry.
     
  3. Hot glue rick-rack trim to the edges of the headband. Hot glue silk flowers to the mid-top section. Hot glue a rhinestone to the center of the flowers. Hot glue a scrap of ribbon around the two ends of the headband to secure the rick-rack. Allow to dry. 
Idea and picture provided by ~ Fave Crafts

Monday, March 21, 2011

Recycled Button Ring

This is one of the easiest, thrifty, crafts projects, that is cheap, quick, and easy: a "button ring"

What You Need:
A Cute button
Wire (.5 mm)
Needle nose pliers (Med - Small size)

What To Do:
cut a 6-8 inch size piece of wire, double wire over; so that you have a loop at one end. put the loop-end through the holes of the button, and make a finger size band. put the end opposite to the loop, through the loop and clasp it shut. Now your done

Note:
I suggest using a two-hole button for this project, and making sure to use water proof wire, to avoid it tarnishing.

~Maddy~